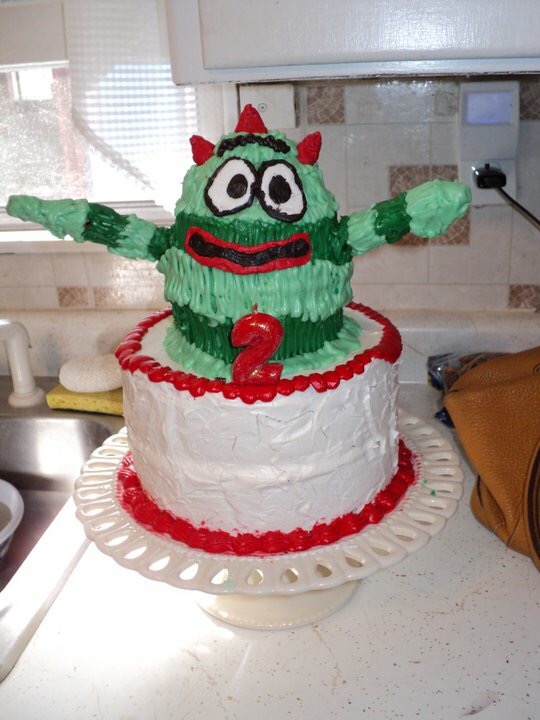
I am the first to admit that I am not the baker, or cake decorator, of the family. My husband is not only an artist, but he loves to bake and spent a good chunk of his high school years working at Baskin Robbins, as their cake decoration specialist. Those things combined generally equal really cool desserts and cakes. How can I possibly compete with our things like our sons 2nd birthday cakes (below)???
My husband- the master cake maker…
That being said, when it comes down to preparing ourselves for a houseful of rowdy boys he usually takes the stuff like preparing the yard and pool, refereeing the sports, and after party clean up, while I take the decorations, menu planning and the cooking (which usually means the birthday cake baking too). This year my son really wanted a football party and, while my Pinterest wall speaks wonders of the ways to decorate football themed cakes, I wasn’t ready to botch an outlandish dessert with something you’d find on “Nailed It”. Instead I tried something simple, and cute…a football shaped cake.
Note: If you are an advanced baker, or can do wonders with fondant and frosting, this post is NOT for you. This tutorial is the simplest football cake you can make- and one that pretty much no one can mess up 🙂 It may not be the most beautiful of all sports cakes, but the boys loved it and I was awed by how truly easy it was.
I started by baking two 9″ round yellow cakes (made with one box of yellow cake mix) per the instructions and allowed them to completely cool.
One box makes two 9″ rounds.
Once cooled, I stacked the cakes on top of one another, using a thin layer of frosting to adhere. Once stacked, I measured and cut/removed 2″ stripe from the very center of the cake and then placed the two pieces together into prolate spheroid (or football shape). Mine was still a bit “fat” and if I were to make this cake again, I would add another 1/2″ or so to the center being removed.
Stacked cakes with center removed.
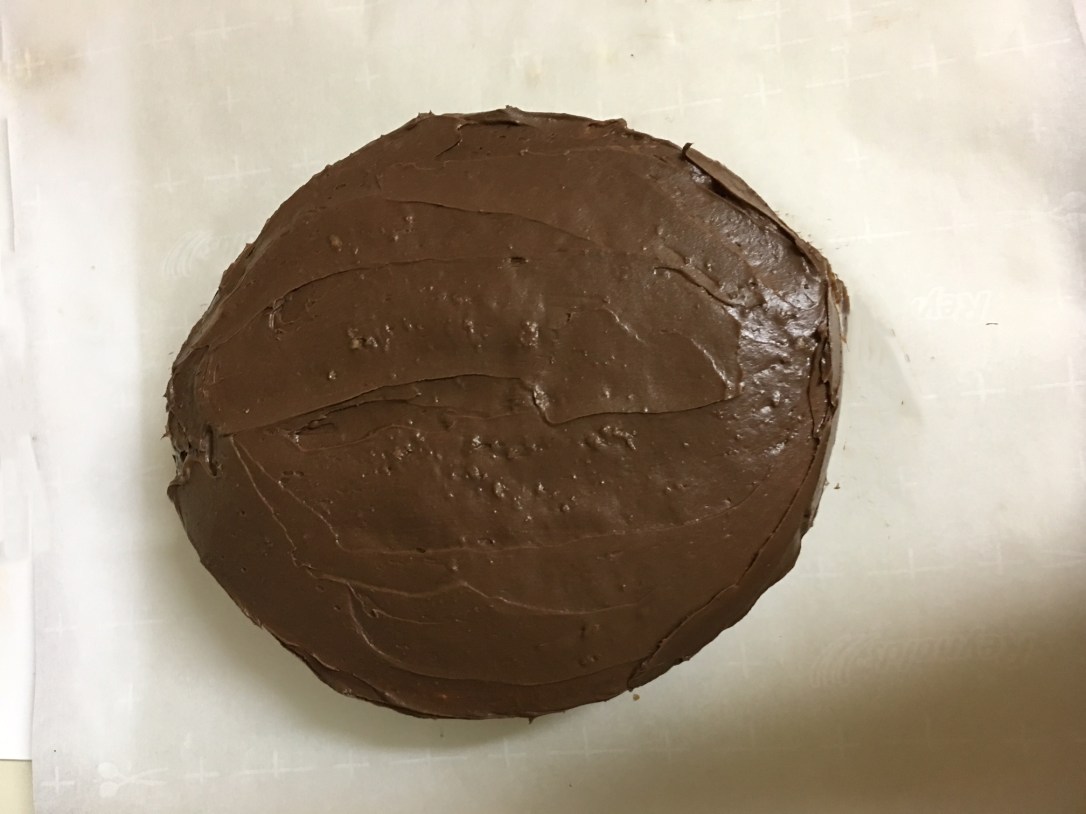
I then frosted the two cakes together with chocolate frosting, ensuring that they were frosted together in one piece. I read a few great blogs and how-to’s that suggested using paper towels to press into the frosting once dry for the football texture. I would have done this, had I not waited till the day of to make the cake…next time!
A football taking shape.
Last, I used a premed tube of Wilton white decorating icing to make laces and seams. And presto- the simplest football cake you can make! Cute for the kids, yet easy for the (non-baking) parents!! Enjoy!
With June here and summer weather underway, I left my requests for my latest Fix wide open, telling my stylist to throw whatever she wanted to my way. I don’t usually do this but I really wasn’t feeling anything super specific, and figured a warm weather fashion boost was just what I needed.
Kristen M was still my stylist (absolutely love that they have kept her in place with my Fixes!!), and her note stated pretty simply that she gave me a variety of things that could be mixed and matched for the summer months. Upon opening my box, I have to say I was super excited just to see the colors (so me!!) and the mix match collection (mixing and matching makes your closet go so much farther, without the extra expense!!).
Bradfield Shoulder Pleat Top – $44
Bradfield Shoulder Pleat Top
This top is beyond cute! I adore the shoulder detail and, despite it being sleeveless, can totally rock this to work without feeling uncomfortable. Though it looks like it is simply a pale gray or blue, it is actually slim navy seersucker, giving it a true summery vibe. This is one of those tops that would look cute with SO much- from skirts to jeans to shorts, and I can see it becoming a summer staple. Above I paired it with a white tank (there are small slits on the side that go just above my jean line, making the tank necessary for work), jeans, and a chunky Stella & Dot statement necklace. It is a Cotton/Nylon blend that can be hand washed.
Verdict- KEPT!
Fitzgerald Crochet Detail Top – $54
Fitzgerald Crochet Detail Top
The color and details of this top are spot on. Definitely not your everyday tank top, and just as easy to dress up as it is to dress down. I can totally see myself throwing this on for a day at the park (like shown above), or for a date night. The crochet back gives this cutie a touch of girly-girl, which I adore, and the fit is perfect. It is 100% Rayon and hand washable. So far, Kristen is on a roll!
Fitzgerald Crochet Detail Top
Verdict- KEEPER!!
Nichola Printed Pencil Skirt – $58
Nichola Printed Pencil Skirt (shown with Bradfield Shoulder Pleat Top & Cloey Crystal Gem Necklace)
I am really trying to wear more skirts and dresses, especially to work- it has become a personal goal of mine. Jeans are just so comfy and easy though, so I always find myself coming back. Because of this draw toward comfort and ease, this skirt is a perfect one for me- spandex stretchy pull on with no buttons or zippers, great color, perfect length, can go with a lot of the colors in my closet, can be worn with flip-flops or heels, etc. The pattern is cute too, giving just the right amount of detail! It is a Polyester blend that can be hand washed.
Verdict- Kept!
Andris Slit Shoulder Knit Top – $48
Andris Shoulder Slit Knit Top
There is nothing I don’t like about this top. Not one thing! The Rayon/Spandex blend is super soft, it is machine washable (yes!!), the shoulder slit is a perfect accent to a normal tank top, the color is the most brilliant blue, and the list goes on…This is yet another item that can totally be dressed up (seen above with the Walt Skirt and heels) or dressed down (also seen above with Old Navy jean shorts and flip-flops). Probably my most favorite piece from this Fix, I cannot wait to sport it this summer!
Verdict- Kept!! (Four out of four?!?!?!)
Cloey Crystal Gem Necklace – $38
Cloey Crystal Gem Necklace (shown with Bradfield Shoulder Pleat Top)
While I do think this necklace is super cute, I am pretty attached/loyal to Stella & Dot (and my girlfriends who sell it!). I feel like this piece actually resembles several of their collection. There are some major upsides to this necklace though. One- it is $38!?! A steal for such a cute piece! Two- with all four other pieces scoring as keepers, to not keep this necklace would actually cost me more than to keep it! (Remember that Stitch Fix gives you 25% your total if you keep all five pieces, saving me a total of $60.50 this go around) Besides, I will definitely wear it with some of the pieces included in this Fix, and think it will be fabulous with the little black dress I scored last Fix (Bonita Crochet Dress shown below)!!
Bonita Crochet Dress- (See my May Fix)Verdict- Kept
So, Kristen and I hit the jackpot this go around! Not only did I love this Fix, but paying a grand total of $161.50 for all five pieces (after my Fix credit and 25% off) is amazing! I cannot wait to see what Kristen has in store for my next fix!!
Stay tuned for July’s Fix! If you have any suggestions, I am always ready to try new styles!!
A note about Stitch Fix:
It’s a super easy to use service…you fill out a style profile, choose the prices you would be willing to pay per each item type, and decide how often you want to get styled. You have the option of setting up your own Stitch Fix Pinterest board that your stylist can look at while styling you. A stylist from Stitch Fix will then be your own personal stylist for however often you choose to receive a box, sending you 5 items based on your style profile, Pinterest board, and personal instructions. If you purchase an item, the $20 service fee goes towards it, if you keep all 5 items, they take 25% off, or you can send all the items back and they only keep the $20.
Check out my “fix” above and (stay tuned for future “fixes”), if you are thinking about trying your own “fix”, use this link https://www.stitchfix.com/referral/6200951 (Note: I will get a credit on a future “fix” if you sign up and will thank you tremendously!!)
When our family moved into our home, it was 100% not us! We loved the neighborhood and area, which is really what sold us, but the house was not really our cup of tea. Little by little, we have been choosing rooms and remodeling- making it fit our style and personalities. (Some of these projects, I will feature in the “Model Home” section of Living Swagger- so stay tuned!) The latest project on that list is our kitchen and dining room.
The vibe we are going for in the dining room is farmhouse meets Scandinavian (a nod to my Swedish heritage). One thing that had to stay was the Vejle Stole & Mobelfabrik Mid Century Danish teakwood dining table that was handed down from my grandparents (just like the one pictured below). The chairs (which we are sadly down to only three of) did not make the cut though, and made the move into storage.
When my husband’s grandparents passed a few years back, we inherited a really cool antique set of wooden chairs with spectacularly carved back. The seat fabric was pretty dated (almost as dated as the second set of fabric we found below it…) though, and was definitely ready for some TLC. What better chairs to go with our table in the dining makeover?!?! I absolutely love the idea that the set could be a collaborative inheritance from both of our grandparents.
SO much hidden potential!
We removed the seats (complete with both sets of fabric and a cushion that was so well-worn that it literally stuck to the wood in places), sanded each chair by hand, and scrubbed the wood seat base clean.
Once they were sanded we sprayed each of them a flat off-white (when spraying big projects, make sure you are in a well ventilated area and wear a mask!), which really made the deep carving of the chair back pop.
We chose two different bright upholstery fabrics (from fabric.com) in Swedish-minded colors, and purchased 2″ high density foam cushions from our local JoAnn’s. Cutting each fabric square to fit the seats, and making sure to pull the fabric tight, we stapled the new fabric and cushions into place.
Once the cushions were restyled we simply screwed them back into place and WOW- what a difference!
I adore everything about the way that these chairs turned out, and how they look in our dining room (in progress)! The end-goal is to build a bench seat to go along the wall, meaning that only four of these chairs will be used daily. The bench is a whole other project though (coming to you soon) so for now, we are using and loving our newly updated chairs!!


 That being said, when it comes down to preparing ourselves for a houseful of rowdy boys he usually takes the stuff like preparing the yard and pool, refereeing the sports, and after party clean up, while I take the decorations, menu planning and the cooking (which usually means the birthday cake baking too). This year my son really wanted a football party and, while my Pinterest wall speaks wonders of the ways to decorate football themed cakes, I wasn’t ready to botch an outlandish dessert with something you’d find on “Nailed It”. Instead I tried something simple, and cute…a football shaped cake.


![FullSizeRender[3]](https://livingswagger.com/wp-content/uploads/2016/05/fullsizerender31.jpg?w=476&h=1024)


